Friday, October 14, 2011
Event Calendar for an ASP.NET MVC Application
Introduction
This tutorial explains the steps required to integrate a Google-like interactive event calendar in an ASP.NET MVC application. We will use dhtmlxScheduler, an Open-Source JavaScript calendar that provides an event scheduling interface with drag-and-drop capabilities and AJAX support. Events can be displayed in Day/Week/Month/Year views and edited by the end-user on the client side.
Going through this article, you will learn how to put this AJAX-based event calendar on a web page, load events from .NET sever side, and update them in the database when the user makes changes in the browser.
Getting Started
First of all, we need to create a new ASP.NET MVC project. We'll call it, for example, "My Calendar". After that, create a database (or use any valid one) where you will save the calendar events. In the database, create the table "Events" with the following set of fields (all fields are mandatory):
| Field | Type | Description |
id | identity, primary key | event ID |
text | text | event description |
start_date | datetime | start date and time of event |
end_date | datetime | end date and time of event |
While the DB tool is open, you can add some test data to the "Events" table. In the attached sample package, you will find the MyCalendar.mdf file which already contains the necessary table and data.
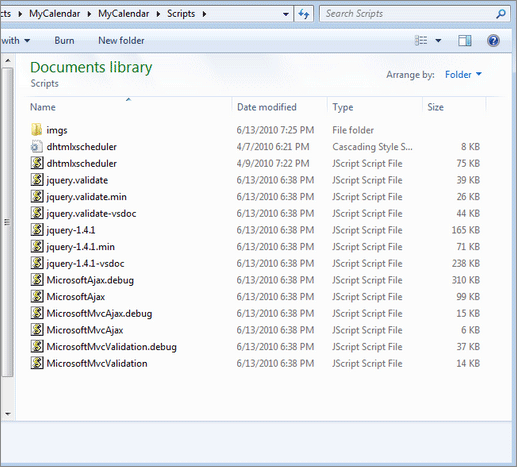
Then we need to download the dhtmlxScheduler package - you can find the download link on the scheduler homepage. When the package is downloaded, unpack it and copy the contents from the folder 'codebase' to the folder 'Scripts' of your project. The result of this step should be similar to this:
Now everything is ready and all the necessary files are in place, so we can proceed to the next step.
Initialization
At the first set-out, we need to create a default view. Add a new controller "
CalendarController" and create the "Index" view for it. Here is the content of the Index.aspx file:<%@ Page Language="C#" Inherits="System.Web.Mvc.ViewPage<dynamic>" %>
<!DOCTYPE html PUBLIC "-//W3C//DTD XHTML 1.0 Transitional//EN"
"http://www.w3.org/TR/xhtml1/DTD/xhtml1-transitional.dtd">
<html xmlns="http://www.w3.org/1999/xhtml" >
<head runat="server">
<title>Index</title>
<script src="http://www.codeproject.com/Scripts/dhtmlxscheduler.js"
type="text/javascript"></script>
<link href="http://www.codeproject.com/Scripts/dhtmlxscheduler.css"
rel="stylesheet" type="text/css" />
<style type="text/css">
html, body
{
height:100%;
padding:0px;
margin:0px;
}
</style>
<script type="text/javascript">
function init() {
scheduler.init("scheduler_here",new Date(2010,6,1),"month");
}
</script>
</head>
<body önload="init()">
<div id="scheduler_here" class="dhx_cal_container" style='width:100%; height:100%;'>
<div class="dhx_cal_navline">
<div class="dhx_cal_prev_button"> </div>
<div class="dhx_cal_next_button"> </div>
<div class="dhx_cal_today_button"></div>
<div class="dhx_cal_date"></div>
<div class="dhx_cal_tab" name="day_tab" style="removed:204px;"></div>
<div class="dhx_cal_tab" name="week_tab" style="removed:140px;"></div>
<div class="dhx_cal_tab" name="month_tab" style="removed:76px;"></div>
</div>
<div class="dhx_cal_header">
</div>
<div class="dhx_cal_data">
</div>
</div>
</body>
</html>The default view loads the .js and .css files of dhtmlxScheduler and inits a full-screen scheduler. The second and third parameters in the
scheduler.init command define the default date and mode, which will be in the calendar just after initialization. Except for the first line, the code doesn't have anything .NET MVC specific. Actually, it's fully taken from the standard dhtmlxScheduler sample.Now we need to do one more thing - update the default route. Switch the default route of the app to the newly created controller in Global.asax.cs:
public static void RegisterRoutes(RouteCollection routes)
{
routes.IgnoreRoute("{resource}.axd/{*pathInfo}");
routes.MapRoute(
"Default", // Route name
"{controller}/{action}/{id}", // URL with parameters
new { controller = "Calendar", action = "Index",
id = UrlParameter.Optional } // Parameter defaults
);
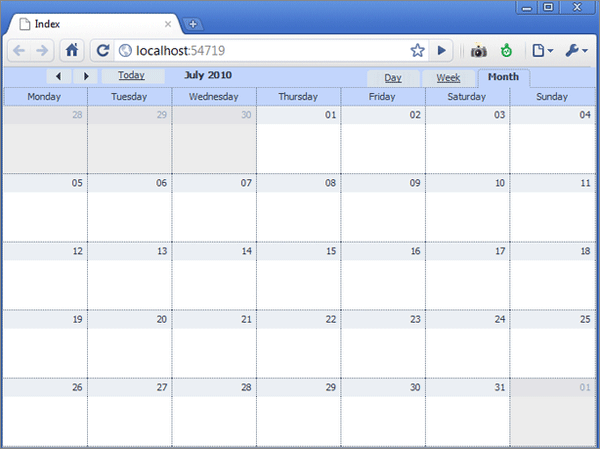
}When everything is done and correct, you can run the app and see the following screen:
If you don't see such a view, most probably you haven't copied the scheduler's files to the folder 'Scripts' correctly, so check it again.
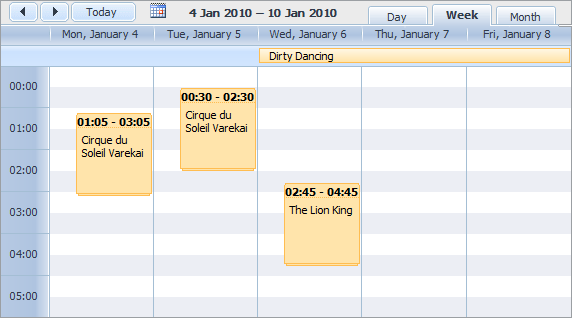
The calendar created with dhtmlxScheduler has a clean and user-friendly interface, and managing the events is quite easy. To create new events, use double click or click-and-drag commands. By clicking on the tabs in the right corner, you can switch views: Day, Week, Month.
Loading Data
The view we have constructed in the previous steps looks fine, but it doesn't contain any data so we need to change this. At first, add 'Model' to your application (just use "Model > Add > Add new item" and select "Data", "Link to SQL Classes"). To complete the process, drag-and-drop the "Events" table to the Model Designer, and then add one more action to CalendarController.cs:
public ActionResult Data()
{
    MyEventsDataContext data = new MyEventsDataContext();
    return View(data.Events);
}
Define the view for that action - Data.aspx:
<%@ Page Language="C#"
   Inherits="System.Web.Mvc.ViewPage<dynamic>" ContentType="text/xml" %>
<data>
<% foreach (var myevent in Model) { %>
<event id="<%=myevent.id%>">
<start_date>
 <![CDATA[<%= String.Format("{0:MM/dd/yyyy HH:mm}",
                            myevent.start_date) %>]]>
</start_date>
<end_date><![CDATA[<%= String.Format("{0:MM/dd/yyyy HH:mm}",
                       myevent.end_date) %>]]></end_date>
<text><![CDATA[<%= myevent.text%>]]></text>
</event>
<% } %>
</data>
Note that this template outputs not HTML, but XML data. For each event, it will output a block of XML data. The extra bit of the code is used to provide the data in the necessary format. If you need to add extra fields to the model, just add the extra tags to the view.
Then we adjust the initialization code of our scheduler in Index.aspx:
<script type="text/javascript">
function init() {
scheduler.config.xml_date = "m/d/Y H:m"; // format of dates in XML
scheduler.init("scheduler_here", new Date(2010, 6, 1), "month");
scheduler.load("/Calendar/Data"); //path to the newly created action
}
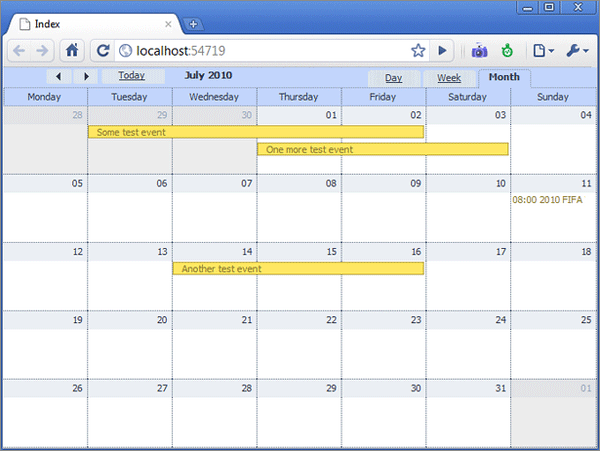
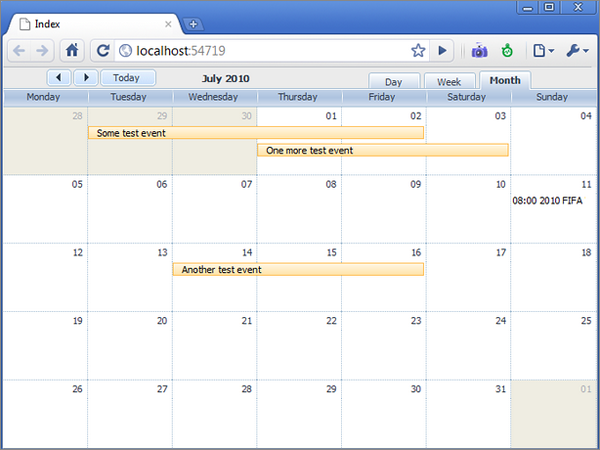
</script>We have just configured the date format (the same as in Data.aspx) and have defined the path to the action 'Data'. At this step, the running application will look like this:
Well, we are in the middle. After the next step, the major part of the job will be done.
Saving to the Database
After all the manipulations described above, we've got the scheduler which loads the events data from the database, but that's not enough. The next goal is to save changes made on the client side to the server. First of all, create one more action - CalendarController.cs:
public ActionResult Save(FormCollection actionValues)
{
    String action_type = actionValues["!nativeeditor_status"];
    Int64 source_id = Int64.Parse(actionValues["id"]);
    Int64 target_id = source_id;

    MyEventsDataContext data = new MyEventsDataContext();
    Event myevent;
    try{
        switch (action_type)
        {
            case "inserted":
                myevent = new Event();
                myevent.start_date = DateTime.Parse(actionValues["start_date"]);
                myevent.end_date = DateTime.Parse(actionValues["end_date"]);
                myevent.text = actionValues["text"];
                data.Events.InsertOnSubmit(myevent);
                break;
            case "deleted":
                myevent = data.Events.SingleOrDefault(ev => ev.id == source_id);
                data.Events.DeleteOnSubmit(myevent);
            break;
            default: // "updated"
                myevent = data.Events.SingleOrDefault(ev => ev.id == source_id);
                myevent.start_date = DateTime.Parse(actionValues["start_date"]);
                myevent.end_date = DateTime.Parse(actionValues["end_date"]);
                myevent.text = actionValues["text"];
                break;
        }
        data.SubmitChanges();
        target_id = myevent.id;
    }
    catch
    {
        action_type = "error";
    }

    return View(new CalendarActionResponseModel(action_type, source_id, target_id));
}
It seems that it's a lot of code but it's quite simple in its logic. In the first lines, we've got the type of the action from the incoming request. Then, according to the type, we insert, delete, or update the data in the database. And after the DB operation has completed, we render a response to the client-side scheduler.
The file Save.aspx will look like this:
<%@ Page Language="C#"
    Inherits="System.Web.Mvc.ViewPage<scheduler.ActionResponseModel>"
    ContentType="text/xml"%>
<data>
<action type="<%= Model.Status %>" sid="<%= Model.Source_id %>"
             tid="<%= Model.Target_id %>"></action>
</data>
The view shown above uses the class
CalendarActionResponseModel to transfer the necessary information from the action to the View. In CalendarController.cs, we add:public class CalendarActionResponseModel
{
public String Status;
public Int64 Source_id;
public Int64 Target_id;
public CalendarActionResponseModel(String status,
Int64 source_id, Int64 target_id)
{
Status = status;
Source_id = source_id;
Target_id = target_id;
}
}Now we update Index.aspx one more time (add a code that will link updates on the client-side scheduler with the action 'Save'):
<script type="text/javascript">
function init() {
    scheduler.config.xml_date = "%m/%d/%Y %H:%i";
    scheduler.init("scheduler_here", new Date(2010, 6, 1), "month");
    scheduler.load("/Calendar/Data");

    var dp = new dataProcessor("/Calendar/Save");
    dp.init(scheduler);
    dp.setTransactionMode("POST", false);
}
</script>
So now, all the changes or new events will be saved to the DB. In addition, the calendar will correctly restore after page reloading. One final step left - improvements.
Improvements
The code we are using in '
SaveController' can be improved by using automatic bindings. In CalendarController.cs:public ActionResult Save(Event changedEvent, FormCollection actionValues)
{
String action_type = actionValues["!nativeeditor_status"];
Int64 source_id = Int64.Parse(actionValues["id"]);
Int64 target_id = source_id;
MyEventsDataContext data = new MyEventsDataContext();
try{
switch (action_type)
{
case "inserted":
data.Events.InsertOnSubmit(changedEvent);
break;
case "deleted":
changedEvent = data.Events.SingleOrDefault(ev => ev.id == source_id);
data.Events.DeleteOnSubmit(changedEvent);
break;
default: // "updated"
changedEvent = data.Events.SingleOrDefault(ev => ev.id == source_id);
UpdateModel(changedEvent);
break;
}
data.SubmitChanges();
target_id = changedEvent.id;
}
catch
{
action_type = "error";
}
return View(new CalendarActionResponseModel(action_type, source_id, target_id));
}To give the calendar a more slick and glossy look, or to customize the coloring scheme, use the online SkinBuilder for dhtmlxScheduler. Select one of the "Glossy" skins to get a more modern look for the calendar. When you're done with the customization, download the skin package (CSS files and images) and unpack them in the folder 'Scripts' (it will overwrite some old scheduler files).
The running app after those updates will produce the final look:
So we have implemented a web-based calendar that can be used in ASP.NET MVC and provides all the necessary functions: loading, saving, deleting, and updating calendar events.
If needed, you may define extra fields, add/move calendar views, and redefine scales and templates configuration (please refer to dhtmlxScheduler documentation). All those modifications can be achieved by adding extra JavaScript commands in the "Index" view. There is no need for any further updates in the "CalendarController.cs" code.
Note that the dhtmlxScheduler sources are distributed under GNU GPL v2. For the licensing details, visit the DHTMLX website.
